Rust Server: Installing a Rust Server Easy
Rust is a multiplayer-only survival sandbox game developed by Facepunch Studios. It was released in early access in 2013 and fully released in 2018. In Rust, players must gather resources, build structures, and craft weapons and tools in order to survive in a harsh and unforgiving world. Rust is known for its challenging gameplay, its emphasis on PvP combat, and its unique world-building system.

How to Build Your Own Local Rust Server Easy
System Requirements
The Rust server can be taxing on your host/local machine but maybe not as much as you might think. As a baseline a 3 square km (default gen size) map freshly generated will run at close to 2 gigabytes of ram. After some stress testing and 150k entities later, can use 6+ gigabytes of memory easily. So I would suggest having at least 8 gigs allocated per server so you don't encounter as much lag during peek times.
100% Automated Install and Setup:
Using the attached batch script at the bottom of this post (".bat" file - windows only) you can automate the entire install process including the option to install oxide or Carbon, setup owner/Moderator ID's and create batch scripts to start, update and wipe your server or if you want to review the code and see what's all in it, you can click here and also download the batch script from there.
To build a Rust server the manual way, you will need the following:
- A copy of SteamCMD
- A copy of the Rust Server installed (using SteamCMD)
- A batch file (text) editor to make and edit your batch script
Once you have all of the necessary components, follow these steps:
-
Create a folder for SteamCMD, such as c:\steamcmd
-
Create a folder for the server, such as c:\rustserver
-
Download SteamCMD for Windows.
-
Extract the contents of the zip file to the folder you created for steamcmd.
-
Execute the steamcmd.exe program for the first time so it can install updates. (Your computer may ask you to confirm that you want to run it.) Once updated, type Exit and press enter.
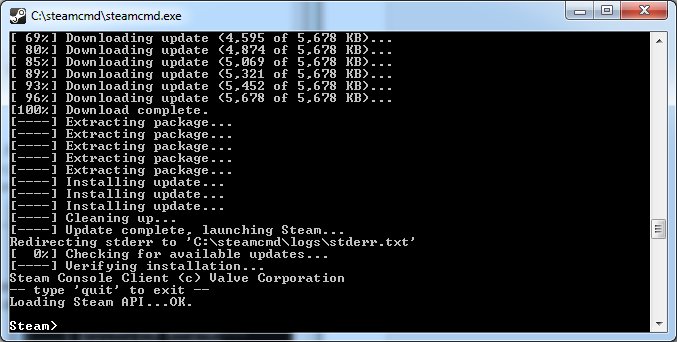
- Open a Terminal window and change directory (cd C:/SteamCMD) into where you installed SteamCMD and run the following command:
steamcmd.exe +login anonymous +force_install_dir C:\rustserver +app_update 258550 +quit
You should see something like this (SteamCMD being updated):
Changing to a different branch
If you want to download the staging branch of Rust that receives the most recent updates, modify the app_update command as follows:
app_update 258550 -beta stagingIf you want to download the prerelease branch of Rust that receives the future/work-in-progress updates, modify the app_update command as follows:
app_update 258550 -beta prereleasePost Install and Configure
Installing Oxide:
you will need to:
- Download the latest version of Oxide for Rust.
- Stop your Rust server.
- Extract the Oxide files to the root directory of your Rust server.
- Replace any existing files with the new Oxide files.
- Start your Rust server.
To verify that Oxide is installed correctly, open the Rust console and type oxide.version. You should see the version number of Oxide that you installed.
Note: If you are using a Rust server hosting provider, they may have a different process for installing Oxide. Please consult with your hosting provider for more information.
Here are some additional tips for installing Oxide:
- Make sure that you download the correct version of Oxide for your operating system.
- If you are using a Linux server, you may need to install the Mono runtime environment before installing Oxide.
- If you are updating Oxide, make sure to back up your Rust server files before you begin.
Once Oxide is installed, you can start installing plugins. Plugins are extensions that add new features and functionality to your Rust server. You can find plugins on the Oxide website or through other third-party websites.
To install a plugin, simply download the plugin file and place it in the /rust/oxide/plugins/ directory. Once a plugin is configured, restart your Rust server so the changes can take effect. The plugin will be loaded when the server starts.
Once a plugin is installed, you can tweak the configure file by editing the plugin's configuration file. Configuration files are located in the /rust/oxide/config/ directory as of this posting.
For more information on installing and using Oxide and plugins, please consult the Oxide documentation.
Once the Rust server is running, you may want to install some mods or plugins. To do this, you will need to download the mod or plugin files and place them in the C:\rustserver\oxide\plugins folder.
Here are some additional tips for installing plugins:
- Make sure that you download plugins from a trusted source.
- Make sure that the plugins are compatible with the version of Rust that you are running.
- Be careful when installing plugins, as some plugins may conflict with each other or cause your server to crash.
- It is a good idea to back up your Rust server files before installing any new plugins.
Once you have installed your desired plugins, you can start enjoying the new features and functionality that they add to your Rust server.
To install Carbon on a Rust server, you can follow these steps:
- Download the latest version of Carbon for Rust from the Carbon website.
- Stop your Rust server.
- Extract the Carbon files to the root directory of your Rust server.
- Replace any existing files with the new Carbon files.
- Start your Rust server.
To verify that Carbon is installed correctly, open the Rust console and type c.version. You should see the version number of Carbon that you installed.
Note: If you are using a Rust server hosting provider, they may have a different process for installing Carbon. Please consult with your hosting provider for more information.
Here are some additional tips for installing Carbon:
- Make sure that you download the correct version of Carbon for your operating system.
- If you are using a Linux server, you may need to install the Mono runtime environment before installing Carbon.
- If you are updating Carbon, make sure to back up your Rust server files before you begin.
Once Carbon is installed, you can start installing plugins. Plugins are extensions that add new features and functionality to your Rust server. You can find plugins on the Carbon website or through other third-party websites.
To install a plugin, simply download the plugin file and place it in the /rust/carbon/plugins/ directory. Then, restart your Rust server. The plugin will be loaded when the server starts.
Once a plugin is installed, you can configure it by editing the plugin's configuration file. Configuration files are located in the /rust/carbon/config/ directory.
For more information on installing and using Carbon and plugins, please consult the Carbon documentation.
Here are some additional benefits of using Carbon on your Rust server:
- Carbon is a lightweight and high-performance modding framework.
- Carbon is backwards compatible with Oxide plugins, so you can continue to use your favorite Oxide plugins with Carbon.
- Carbon has a built-in stack and gather manager, which makes it easy to manage resources on your server.
- Carbon has a permissions system that allows you to give players different permissions on your server.
- Carbon has a hook system that allows you to customize the behavior of your server.
- Carbon has chat and console support, so you can interact with your players and manage your server from the console.
- Carbon has an embedded demystifier, which makes it easy to debug plugins and troubleshoot problems.
Other information:
You can start the Rust server with specific configuration options. To do this, add the desired configuration options to the RustDedicated.exe command line in the batch file. For example, to start the server with a different port number, you would add the following line to the batch file:
RustDedicated.exe -batchmode +server.port 28017
You can find a list of all available configuration options on the official Rust website but the most common batch file looks something like:
 @echo off
:start
C:\steamcmd\steamcmd.exe +login anonymous +force_install_dir c:\rustserver\ +app_update 258550 +quit

RustDedicated.exe -batchmode +server.port 28015 +server.level "Procedural Map" +server.seed 1234 +server.worldsize 4000 +server.maxplayers 10  +server.hostname "Name of Server as Shown on the Client Server List" +server.description "Description shown on server connection window." +server.url "http://yourwebsite.com" +server.headerimage "http://yourwebsite.com/serverimage.jpg" +server.identity "server1" +rcon.port 28016 +rcon.password letmein +rcon.web 1

goto start
Connecting to your server
Run the Rust Client, and do not select a server. Note that your server will not show up under the “Local Network” tab. Instead, press F1 and go to the client console. Assuming you used the default port of 28015, type in the following command to connect to your server:
client.connect localhost:28015Adding Owners and Moderators
Once the server is up and running you may choose to assign ownership to yourself. This is done with the ownerid command. You will need your 17 digit SteamID number, click here to find it. The easiest way to get it, is to log in and then run the users command at the console. Then enter the command as follows:
ownerid 12345678901234567 "Admin Name"You can do the same for moderators using the moderatorid command
moderatorid 12345678901234567 "Mods Name"Note: As with most commands that allow the use of player names, if the name has spaces or special characters in it, you must use quotes to contain the name.Be sure to use the writecfg command after doing this and then the person must logout and log back in to receive the permissions. The two permissions are almost identical. Owners can create, kick and ban moderators if needed, but moderators cannot affect owners.
Sharing Your Server with the World
If you wish others to be able to connect to your server from the outside world, you will need to setup a port forward using the port you used listed above. I recommend using this Steam Server Guide if you are unfamiliar with setting up port forwarding. You will need to forward your “server.port” as well as “rcon.port” if used. By default these are 28015 and 28016.
Even if your server does not show up on the server list, players may be able to connect to you via the client.connect command if they know your public IP. Local firewall programs can also affect the ability to connect from the outside world. If you suspect this, turn off the firewall briefly.

Conclusion
Building a Rust server using a batch file and post install is a relatively straightforward process. By following the steps above, you can have a Rust server up and running in minutes.
Files
What's Your Reaction?