Basics of Building a Computer
Building a computer from scratch can be a daunting but highly rewarding endeavor. Whether you're a tech enthusiast looking to gain a deeper understanding of computer hardware or a DIY enthusiast with a passion for creating something from the ground up, this comprehensive guide will walk you through the process step by step. We'll cover everything from selecting components to assembling and configuring your system. By the end of this article, you'll have the knowledge and confidence to build your own computer.
Table of Contents
- Introduction
- Understanding the Basics
- 2.1. What Is a Computer?
- 2.2. Computer Hardware Components
- Planning Your Build
- 3.1. Setting a Budget
- 3.2. Determining Your Use Case
- Selecting Components
- 4.1. Central Processing Unit (CPU)
- 4.2. Motherboard
- 4.3. Memory (RAM)
- 4.4. Storage
- 4.5. Graphics Processing Unit (GPU)
- 4.6. Power Supply Unit (PSU)
- 4.7. Case
- 4.8. Additional Components
- Assembly
- 5.1. Preparing Your Workspace
- 5.2. Mounting the CPU
- 5.3. Installing the CPU Cooler
- 5.4. Attaching the Motherboard
- 5.5. Installing RAM
- 5.6. Adding Storage Devices
- 5.7. Installing the GPU
- 5.8. Connecting Power Cables
- 5.9. Cable Management
- 5.10. Powering On
- Software Installation
- 6.1. Operating System
- 6.2. Drivers
- 6.3. Essential Software
- Post-Assembly Checklist
- 7.1. BIOS Configuration
- 7.2. Testing and Troubleshooting
- Advanced Tips and Tricks
- 8.1. Overclocking
- 8.2. Cable Management Techniques
- 8.3. Custom Cooling Solutions
- Maintenance and Upgrades
- 9.1. Keeping Your System Clean
- 9.2. Upgrading Components
- Conclusion
1. Introduction
Building a computer from scratch is an exciting venture that allows you to create a custom system tailored to your specific needs. While it may seem complex at first, it's an achievable feat with the right guidance. In this guide, we'll break down the process into manageable steps, making it accessible to even those just starting in the world of DIY PC building.
2. Understanding the Basics
2.1. What Is a Computer?
Before you embark on building your own computer, it's crucial to understand the fundamental concept of a computer. At its core, a computer is a machine designed to process and store data. It does this through various hardware components and software programs. In simple terms, a computer is a collection of electronic devices that work together to execute tasks and solve problems.
2.2. Computer Hardware Components
Computers consist of several key hardware components, each serving a unique function. Here's a brief overview of these essential parts:
-
Central Processing Unit (CPU): Often referred to as the brain of the computer, the CPU executes instructions and performs calculations.
-
Motherboard: The motherboard is the central circuit board that connects all components, providing communication and power distribution.
-
Memory (RAM): Random Access Memory is the temporary storage used by the computer to hold data and programs while they are in use.
-
Storage: Hard Disk Drives (HDDs) and Solid-State Drives (SSDs) are used to store data, programs, and the operating system.
-
Graphics Processing Unit (GPU): The GPU handles graphical computations and is essential for gaming and graphics-related tasks.
-
Power Supply Unit (PSU): The PSU provides electrical power to all components in the computer.
-
Case: The computer case houses and protects all the internal components, providing cooling and airflow.
-
Additional Components: This includes various peripherals such as the monitor, keyboard, mouse, and any additional hardware you wish to connect.
Now that you have a basic understanding of what a computer is and its key components, it's time to plan your build.
3. Planning Your Build
3.1. Setting a Budget
Before diving into the world of computer components, it's essential to establish a budget for your build. Your budget will largely dictate the quality and performance of the components you select. Be realistic about what you can afford and remember that there are options for every price range. Building a computer can be cost-effective compared to purchasing a pre-built system, but it's still essential to set a clear budget from the start.
3.2. Determining Your Use Case
The purpose of your computer will greatly influence the components you select. Are you building a gaming PC, a workstation for content creation, or a general-purpose system for everyday tasks? Identifying your primary use case will help you make informed decisions about the CPU, GPU, and RAM you need. Consider the specific software and applications you'll be using and any future upgrades you might want to accommodate.
4. Selecting Components
With your budget and use case in mind, it's time to select the individual components that will make up your computer. We'll go through each key component and discuss what to look for when making your choices.
4.1. Central Processing Unit (CPU)
The CPU is one of the most critical components of your computer. When selecting a CPU, consider factors like brand, model, clock speed, and the number of cores and threads. For gaming and general use, mid-range CPUs are usually sufficient. However, for demanding tasks like video editing or 3D rendering, you may want a high-end CPU.
4.2. Motherboard
Your choice of motherboard should be compatible with your CPU and offer the features you need. Consider factors like the motherboard's form factor, available ports, expansion slots, and support for future upgrades. Some motherboards are designed for gaming, while others cater to professional workloads.
4.3. Memory (RAM)
RAM plays a crucial role in system performance. The amount of RAM you need depends on your use case. For most users, 16GB is a good starting point, but you might require 32GB or more for professional tasks. Consider the RAM's speed and latency when making your selection.
4.4. Storage
You have a choice between traditional Hard Disk Drives (HDDs) and Solid-State Drives (SSDs). SSDs are significantly faster and more reliable than HDDs, making them the preferred choice for the operating system and frequently used applications. For bulk storage, you can still use an HDD for cost-effectiveness.
4.5. Graphics Processing Unit (GPU)
Your choice of GPU depends on your gaming or graphics-related requirements. Entry-level GPUs are suitable for casual gaming, while high-end GPUs are essential for running modern AAA games at high settings or handling professional graphics work. Consider factors like VRAM, clock speed, and brand.
4.6. Power Supply Unit (PSU)
The PSU should provide enough power for all your components while leaving room for future upgrades. Check the wattage requirements of your CPU and GPU, and choose a PSU that meets those needs with some overhead. Ensure it's from a reputable manufacturer for reliability.
4.7. Case
The case you choose should fit your selected motherboard form factor, provide adequate cooling, and accommodate your desired number of drives and expansion cards. Consider factors like airflow, cable management, and aesthetics.
4.8. Additional Components
Don't forget about peripherals like a monitor, keyboard, and mouse. Select these based on your preferences and intended use. You'll also need an operating system; Windows, Linux, and macOS are common choices, depending on your needs.
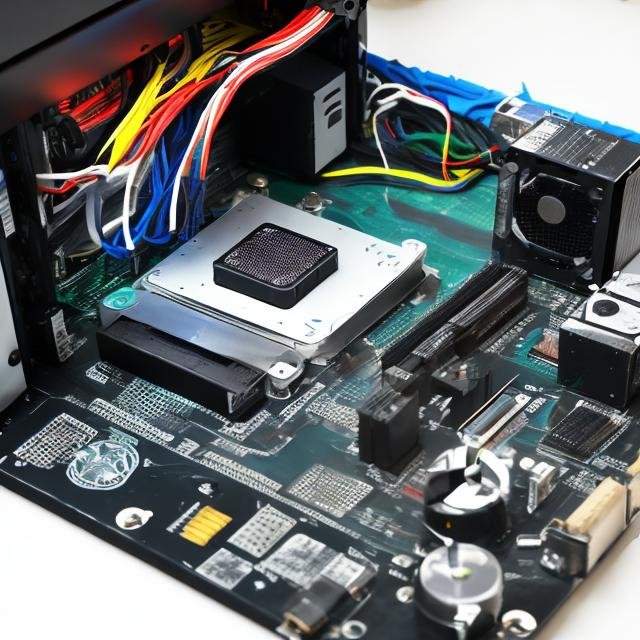
5. Assembly
Now that you've selected all the necessary components, it's time to put your computer together. This is the most hands-on and exciting part of the process. Follow these steps carefully:
5.1. Preparing Your Workspace
-
Choose a clean, well-lit workspace with ample room to lay out your components.
-
Gather all necessary tools, such as a screwdriver, cable ties, and an anti-static wrist strap to prevent damage from static electricity.
-
Review the manuals for your components, especially the motherboard manual, to understand their layout and connections.
5.2. Mounting the CPU
-
Ground yourself by attaching the anti-static wrist strap to your wrist and an unpainted metal surface.
-
Carefully remove the CPU from its packaging and gently place it into the CPU socket on the motherboard. Be cautious not to touch the CPU pins or socket.
-
Secure the CPU by lowering and latching the retention arm.
5.3. Installing the CPU Cooler
-
Apply a small amount of thermal paste to the CPU.
-
Mount the CPU cooler according to the manufacturer's instructions, ensuring a tight and secure fit. This step may vary depending on whether you're using an air cooler or liquid cooler.
5.4. Attaching the Motherboard
-
Place the motherboard inside the case, aligning the screw holes.
-
Secure the motherboard to the case using the provided screws, following the case and motherboard manual for guidance.
5.5. Installing RAM
-
Open the RAM slots on the motherboard by releasing the retention clips.
-
Align the notches on the RAM sticks with the notches on the motherboard's slots, then gently push the RAM into place until the clips secure it.
5.6. Adding Storage Devices
- Connect your storage devices (HDDs and SSDs) to the motherboard using SATA cables and power cables from the PSU.
5.7. Installing the GPU
-
Carefully insert the GPU into the PCIe slot on the motherboard.
-
Secure the GPU by screwing it into the case, if necessary.
-
Connect any necessary power cables to the GPU from the PSU.
5.8. Connecting Power Cables
-
Connect the main 24-pin ATX power cable from the PSU to the motherboard.
-
Connect the CPU power cable to the motherboard, typically an 8-pin or 4+4-pin connector.
-
Connect power cables to all drives and the GPU.
5.9. Cable Management
- Neatly route and secure cables to ensure proper airflow and aesthetics. Use cable ties and Velcro straps to manage cables.
5.10. Powering On
-
Carefully connect all peripherals (monitor, keyboard, mouse).
-
Plug the power cable into the PSU and the wall outlet.
-
Press the power button and watch as your creation comes to life.
6. Software Installation
With your computer physically assembled, it's time to install the necessary software to get it up and running.
6.1. Operating System
You'll need an operating system (OS) to use your computer. Insert the OS installation media (e.g., a USB drive or DVD) and follow the on-screen prompts to install the OS. Be sure to activate it with a valid license key.
6.2. Drivers
Install the drivers for your motherboard, GPU, and other components. Most components come with driver discs, or you can download the latest drivers from the manufacturer's website. Ensure your system is up to date.
6.3. Essential Software
Install essential software such as web browsers, office suites, and any other applications you need for your specific use case.
7. Post-Assembly Checklist
Your computer is now up and running, but there are a few important tasks to complete to ensure everything is functioning as it should.
7.1. BIOS Configuration
Access the BIOS (usually by pressing a key like Delete, F2, or F12 during startup) and configure settings such as boot order, RAM speed, and CPU clock speed. Refer to your motherboard's manual for guidance.
7.2. Testing and Troubleshooting
Run tests to ensure your CPU, GPU, RAM, and storage are functioning correctly. Monitor temperatures and check for any unusual noises or issues. Address any problems you encounter.
8. Advanced Tips and Tricks
If you're feeling adventurous and want to push your computer's performance to the max, consider these advanced tips and tricks:
8.1. Overclocking
Overclocking involves increasing the clock speed of your CPU or GPU to boost performance. However, it also generates more heat, so it should be done cautiously and with proper cooling solutions.
8.2. Cable Management Techniques
Optimize your cable management skills for better airflow and aesthetics. Use cable combs, shrouds, and custom cable kits for a clean and professional look.
8.3. Custom Cooling Solutions
Consider advanced cooling solutions like liquid cooling for the CPU and GPU to achieve better thermal performance and lower noise levels.
9. Maintenance and Upgrades
Your computer will require ongoing maintenance to ensure it runs smoothly. Here are some tips:
9.1. Keeping Your System Clean
Regularly clean dust and debris from your computer's components, especially fans and heatsinks. This will help maintain proper airflow and cooling.
9.2. Upgrading Components
As technology advances, you may want to upgrade individual components like the CPU, GPU, or storage. Be sure to check compatibility and consider the power requirements when upgrading.
10. Conclusion
Building a computer from scratch is a gratifying experience that grants you a deeper understanding of how computers work. Whether you're a gamer, content creator, or someone looking for a versatile system, building your own PC allows you to create a custom machine that perfectly suits your needs.
By following the steps outlined in this comprehensive guide, you've gained the knowledge and confidence to embark on your DIY PC building journey. Remember, each build is unique, and as you gain experience, you can tailor your creations to match your evolving preferences and requirements. Enjoy the process, and may your new computer serve you well for years to come. Happy building!
What's Your Reaction?